win8

August 16, 2012 win8 telerik

Telerik Loves Windows 8 and Visual Studio 2012 RTMs!

Telerik Loves Windows 8 and Visual Studio 2012 RTMs!

win8vs2012Yesterday’s release of Visual Studio 2012 and Blend for Visual Studio 2012 marks the beginning of a new era. In some ways, VS2012 and Blend are incremental releases, adding even better support for building enterprise and consumer apps and services for the desktop and the web. However, in one very important way, the release of VS2012 and Blend, together with the release of Windows 8 earlier this month, signals a whole new focus for the platform — that of touch-centric tablets — and with it, a whole new way to package and distribute apps for the Windows operating system — the Windows Store.

If Windows 8 sells even half of what Windows 7 has sold (which seems low, considering the support for a great number of new form factors), then that will represent 300 million customers all looking for new Windows 8 apps in the Store. Currently, that Store holds about 500 apps and even if Microsoft increases that number to 5,000 by general availability in October, that’s far short of the 500,000 apps that similar app stores have. In short, Windows 8 is going to have lots of users and those users are going to want to buy lots of apps. This is, of course, why Visual Studio 2012 and Blend are so important — they’re the tools you can use to design, develop and package your app for the Store and tap into those hundreds of millions of customers. Make no mistake — Windows 8 represents nothing short of a reboot of the Windows developer ecosystem and Visual Studio 2012 and Blend are the keys to that ecosystem.

Windows 8, Visual Studio 2012 and Blend are important to Windows developers, which makes it important to Telerik customers. Because of that, we’ve been on the cutting edge here since the BUILD conference in September, releasing metro themes that first week and supporting the Beta and RCs in our tools and controls. And now I’m happy to announce that we fully support Windows 8, Visual Studio 2012 and Blend across nearly all of our Windows developer products. And not only do we support them, but we take special advantage of their unique features in our products, as you can read in the following posts:

Of course, this is just the beginning of the tablet and mobile era for Windows developers, so count on Telerik to continue to push into Windows 8 and Windows Phone 8 for building touch-centric apps for both the Windows Store and the Windows Phone Store, as well as continuing to push our products to meet your needs on the desktop and on the web. Telerik’s been right there through the last decade of Windows development and you can expect us to be there for the next decade.

Chris Sells
VP, Developer Tools
@csells

March 12, 2012 telerik win8

WinJS Promises: then and done

WinJS Promises: then and done

As of the Windows Consumer Preview (aka Win8 Beta), the WinJS promises object has a done” method as well as a then” method. The done” method is just like then” except that it turns unhandled errors into exceptions. If you read no further, know this:

Always call done” as the last promise method in your promise chain.

Let’s say you have a promise implementation that makes failure a strong possibility:

  1. var prom = new WinJS.Promise(function (c, e, p) { e(#fail”); });

A fastidious developer will always pass in an error handler whenever then call the then” method of a promise:

  1. prom.then(…, function (m) { content.innerText = Handled: + m; });

However, in the case that the developer doesn’t pass in a error handler function when calling then”, the error will silently drop on the floor:

  1. prom.then(); // error? what error?

I realize that the web was built around the idea that page errors should just silently whistle into the wind, but as an app developer:

Errors should be loud.

So, I want my errors to be loud, I should default to using the done” method on a promise instead:

  1. prom.done(); // error == BOOM!

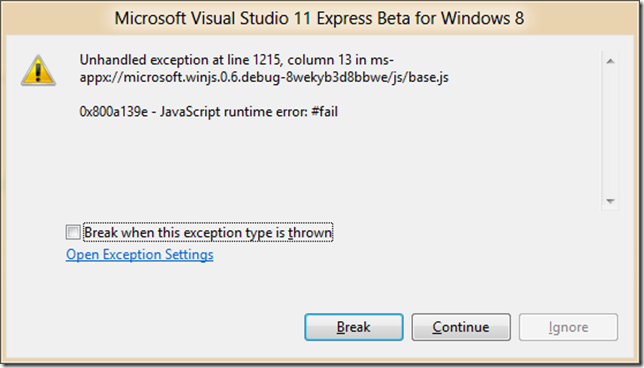
When I call the done” method and an unhandled error is detected, WinJS throws an error that not even a try-catch handler will stop from showing in the developer’s face:

image

Personally, I’d prefer to be able to catch such errors in try-catch blocks, but this behavior is far preferable to the error being ignored. Of course, if I care that much, I can provide an error handler function when calling done:

  1. prom.done(…, function (m) { content.innerText = Handled: + m; });

And finally, if I want to chain my promises, I just need to put the then” methods in between so the errors flow, but the done” method should always be last:

  1. var app = WinJS.Application;
  2. app.onactivated = function (eventObject) {
  3.   // start the download
  4.   downloadStatus.innerText = downloading posts…”;
  5.  
  6.   // process the declarative controls
  7.   WinJS.UI.processAll()
  8.   .then(function () {
  9.     // use the WinRT to download the RSS
  10.     var syn = new Windows.Web.Syndication.SyndicationClient();
  11.     var url = new Windows.Foundation.Uri(http://blogs.msdn.com/b/oldnewthing/rss.aspx”);
  12.     return syn.retrieveFeedAsync(url);
  13.   })
  14.   .done(processPosts, downloadError);
  15. };

This is actual code from an app that pulls down an RSS feed after the processAll method is completed in the then” method on line 8, which returns another promise on line 12. That promise is handled by the done” method on line 14. If there had been an error in the download and as a developer, I’d forgotten to provide the downloadError” error handler, I’d have gotten a giant exception dialog that would’ve encouraged me down a different path.

Thanks to Josh Williams from the WinJS team for reminding me of the done” method.

February 29, 2012 tools win8 telerik

What’s New in the Beta Metro/JS Templates for VS11

What’s New in the Beta Metro/JS Templates for VS11

The Consumer Preview of Windows 8 (aka the Win8 beta) is now available for download, along with the matching Visual Studio 11 beta. You can download them both from the Developer Center for Metro style Apps and at least when I did the downloading this morning, it was smooth and worked well. In case you’re interested, I downloaded the ISO, not the setup, and I am currently writing this blog entry in Windows Live Writer running inside a WMWare Workstation 8.0 virtual machine running on the Windows 7 host OS running inside Boot Camp on my MacBook Pro. As someone said to me this morning: That’s a lot of VMs!” Maybe so, but the Win8 and VS11 betas are running surprisingly well inside of my Inception-box.

Metro/JS Templates for VS11 in BUILD

If you played around with the Metro/JS templates in VS11 from the BUILD conference in September, you’ll have noticed that the generated apps were compliant with the Windows 8 UX style guidelines, but that two of the templates — Grip and Split — generated large amounts of code. That’s because these are pretty much the biggest apps that Microsoft has ever shipped as templates. They each have multiples pages and they work hard at being simple but feature complete Metro style apps.

However, as well as the BUILD templates implemented the Win8 UX, their code wasn’t the greatest, for the following reasons:

  • The templates were attempting to codify best practices for a brand-new app model. That’s always going to take time to get right.
  • There was only so much time to get it right before BUILD — it was either have great code or implement a great UX, so the template team chose the latter.
  • The bonehead PM in charge at the time (me) decided it was a better choice to push the data model into each page instead of centralizing it. That was a bad idea.
  • The data model, spread as it was across nearly every JS file in the templates, was assumed to be static. However, the vast majority of apps get their data dynamically from some external source and the template-generated code made that very hard to implement.
  • There were a number of features that the templates needed that didn’t exist directly in the platform, either in WinJS, the IE DOM or in the WinRT libraries, so the templates needed to provide those features.

All of these reasons meant that the functionality of the generate Grid and Split apps made for an instructional start to building your own Metro style apps, assuming you were willing to wade through a great deal of code. The new templates in the Win8 beta solve nearly all of these problems.

Get-VS-11-BetaMetro/JS Templates for VS11 Beta

Out of the box, the Metro/JS templates in the VS11 beta (made available today, Feb 29, 2012), get more betterer as they get more complex.Let’s start simple and work our way up.

image

Blank Application

The Blank Application template is almost the smallest Metro/JS app you can build, except that it includes a reference to the Microsoft Windows Library for JavaScript (aka WinJS):

image

And to be clear, this is a brand new feature. Including WinJS as a reference instead of dropping the code into each project means that MS can shipped a single shared implementation instead of every app in the store duplicating the code. If you want to duplicate the code into your project, you can do so, but you’ll also have to update the URL references to the JS and CSS files from your HTML files, like this snippet from the generated default.html:

default.html
  1. <link href=“//Microsoft.WinJS.0.6/css/ui-dark.css” rel=“stylesheet”>
  2. <script src=“//Microsoft.WinJS.0.6/js/base.js”></script>
  3. <script src=“//Microsoft.WinJS.0.6/js/ui.js”></script>

In addition to the new syntax with the leading double-slashes, that the number of WinJS files to include is a far smaller number in the Beta. Now it’s just base.js and ui.js, which makes it easy to decide which one(s) you want and in what order to include them, fixing a common problem in the BUILD bits.

One other thing that’s new in the Blank Application template is that there are stubs for implementing tomb-stoning to easily save and restore your app’s session state in the default.js:

default.js
  1. var app = WinJS.Application;
  2.  
  3. app.onactivated = function (eventObject) {
  4.     if (eventObject.detail.kind === Windows.ApplicationModel.Activation.ActivationKind.launch) {
  5.         if (eventObject.detail.previousExecutionState !== Windows.ApplicationModel.Activation.ApplicationExecutionState.terminated) {
  6.             // TODO: This application has been newly launched. Initialize
  7.             // your application here.
  8.         } else {
  9.             // TODO: This application has been reactivated from suspension.
  10.             // Restore application state here.
  11.         }
  12.         WinJS.UI.processAll();
  13.     }
  14. };
  15.  
  16. app.oncheckpoint = function (eventObject) {
  17.     // TODO: This application is about to be suspended. Save any state
  18.     // that needs to persist across suspensions here. You might use the
  19.     // WinJS.Application.sessionState object, which is automatically
  20.     // saved and restored across suspension. If you need to complete an
  21.     // asynchronous operation before your application is suspended, call
  22.     // eventObject.setPromise().
  23. };

The handling of the terminated state in the onactivated event on line 3 and the checkpoint event handler on like 16 are for reactivating and saving your app state respectively.

And finally, the handy TODO comments are something you’ll find sprinkled throughout the templates based on usability feedback conducted to determine what developers really need help with as they add their own functionality to the app.

Fixed Layout Application

Moving up the complexity scale, the Fixed Layout Application template is meant to do just what it says — provide a jumping off point for apps that are logically fixed layout. The crux of this code is the use of the ViewBox control in the default.html:

default.html
  1. <body>
  2.     <div data-win-control=“WinJS.UI.ViewBox”>
  3.         <div class=“fixedlayout”>
  4.             <p>Content goes here</p>
  5.         </div>
  6.     </div>
  7. </body>

Line 2 wraps the content of the app in a ViewBox control, which will scale everything inside of it to the size of the content, which is defined in the default.css file with the fixedLayout style:

default.css
  1. .fixedlayout {
  2.     -ms-grid-columns: 1fr;
  3.     -ms-grid-rows: 1fr;
  4.     display: -ms-grid;
  5.     height: 768px;
  6.     width: 1024px;
  7. }

You’ll see in lines 5 and 6 that the height and width of the div contained in the ViewBox is 768x1024, which means that the content can be created using absolute positioning and sizing. The job of the ViewBox is as the app is resized, either the computer’s resolution changes or more likely the app is moved between landscape, portrait, split and full sizes, the ViewBox will scale the content to take up as much room as possible, keeping the aspect ratio constant and scaling the content such that the app itself can think of itself as logically 768x1024 (or whatever the top-level div’s size is). This is very handy for building things like casual games where you want scaling, but generally not flowing — you want to control where the Scrabble tiles are or the tic-tac-toe pieces and it’s much easier to do that with a fixed size.

And now that I’ve described it, I’ll tell you that this template is the only one that’s structurally identical between BUILD and Beta. Still, it is useful.

Navigation Application

The next one up the ladder is the Navigation Application template, which is where we get the Back button and the support for moving HTML fragments into and out of the DOM just like the user was logically navigation page-to-page. In the BUILD bits, this navigation functionality was packaged in the default.js file, but in the Beta, default.js is just the same as the simpler templates. Instead, the navigation functionality is packaged into a new file: navigator.js. The reason this file is separate is to make it clear if you’d like to implement a different navigation policy, e.g. MVC, then this is the file to start with. Further, while this functionality would seem a shoe-in to be included in WinJS, it’s not quite baked” enough, which means that MS hasn’t yet decided that this is the way” to do navigation.

Still, it’s a way” to do navigation in a Metro/JS app and a pretty useful one. Essential the way it works is that there is a singleton PageControlNavigator in the default.html file that holds the pages as they’re swapped in. The default.html is also where navigator.js is included:

default.html
  1. <script src=“/js/navigator.js”></script>
  2. <div id=“contenthost” data-win-control=“Application7.PageControlNavigator” data-win-options=“{home: /html/homePage.html’}“></div>

The navigator.js file defines the PageControlNavigator control, which holds the logical pages as the user clicks around in the application. The home parameter is where to start the navigation. Navigation is to a Page, which is really a mapping between an HTML file and a set of events to handle over the lifetime of that Page:

homePage.js
  1. // This function is called whenever a user navigates to this page. It
  2. // populates the page elements with the app’s data.
  3. function ready(element, options) {
  4.     // TODO: Initialize the fragment here.
  5. }
  6.  
  7. WinJS.UI.Pages.define(/html/homePage.html”, {
  8.     ready: ready
  9. });

Of course, navigating to the home page is going to be rare compared to navigating between pages. The easiest way to get a new page to add to your app is to right-click on your project in the Solution Explorer and select Add | New Item:

image

The last item three item templates on the list are for shell contract implementations, which are beyond the scope of this blog post, but the first one is a Page Control, which gives us a triad of HTML, JS and CSS that fits exactly into the navigation model provided by the PageControlNavigator control:

page2.html
  1. DOCTYPE html>
  2. <html>
  3. <head>
  4.     <meta charset=“utf-8”>
  5.     <title>page2</title>
  6.  
  7.    
  8.     <link href=“//Microsoft.WinJS.0.6/css/ui-dark.css” rel=“stylesheet”>
  9.     <script src=“//Microsoft.WinJS.0.6/js/base.js”></script>
  10.     <script src=“//Microsoft.WinJS.0.6/js/ui.js”></script>
  11.    
  12.     <link href=“page2.css” rel=“stylesheet”>
  13.     <script src=“page2.js”></script>
  14. </head>
  15. <body>
  16.     <div class=“page2 fragment”>
  17.         <header aria-label=“Header content” role=“banner”>
  18.             <button class=“win-backbutton” aria-label=“Back” disabled></button>
  19.             <h1 class=“titlearea win-type-ellipsis”>
  20.                 <span class=“pagetitle”>Welcome to page2</span>
  21.             </h1>
  22.         </header>
  23.         <section aria-label=“Main content” role=“main”>
  24.             <p>Content goes here.</p>
  25.         </section>
  26.     </div>
  27. </body>
  28. </html>


page2.cs
  1. .page2 p {
  2.     margin-left: 120px;
  3. }


page2.js
  1. // This function is called whenever a user navigates to this page. It
  2. // populates the page elements with the app’s data.
  3. function ready(element, options) {
  4.     // TODO: Initialize the fragment here.
  5. }
  6.  
  7. function updateLayout(element, viewState) {
  8.     // TODO: Respond to changes in viewState.
  9. }
  10.  
  11. WinJS.UI.Pages.define(/page2.html”, {
  12.     ready: ready,
  13.     updateLayout: updateLayout
  14. });

Navigating to this new control defined by these files is a simple matter of calling the navigate method:

homePage.html
  1. <a onclick=“WinJS.Navigation.navigate(‘/page2.html’)“>Page 2</a>

As far as the user is concerned, the anchor tag shows up as a link like any other:

image

Clicking on Page 2” fires the onclick event, which calls the navigate method, passing in the path to the HTML file and causes the Page control defined in page2.html, page2.js and page2.css to be loaded:

image 

In addition to whatever content on your Page control, notice that the Back button shows up automatically. The Back button manages navigation via clicking, touching and the browser keys; Ctrl+Left Arrow and Ctrl+Right Arrow work as Back and Forward respectively.

Grid and Split Application

At this point, we’ve covered almost all of the core concepts that make up the Grid and Split applications: they bring in WinJS by reference, they use controls and they use navigation via the Page controls. In fact, even though the Grid app has three pages and the Split app has two, they’re really just the navigation template with the pages to implement the Grid and Split app patterns that MS decided were the major app patterns appropriate for Win8. However, the Grid and Split application templates do have two major features that the other templates don’t have: support for multiple view states and a centralized data model.

Multiple view state support means that as the app is moved between portrait, landscape, full and split, the app adjusts itself to look good in all states. The view state management is mostly handled with CSS styles associated with media modes, like in the Split App’s itemsPage.css:

itemsPage.css
  1. @media screen and (-ms-view-state: snapped) {
  2.     .itemspage .itemslist .win-vertical.win-viewport .win-surface {
  3.         margin-bottom: 30px;
  4.     }

In Metro/JS apps, MS has provided a media query predicate called -ms-view-state, which can be one of the four view states and the styles in the media query block will be applied when the app moves to that state. In addition, if you want to handle the view state change in JS, you can do so with updateLayout event in your Page control, like this snippet from itemsPage.js:

itemsPage.js
  1. // This function updates the page layout in response to viewState changes.
  2. updateLayout: function (element, viewState) {
  3.     var listView = element.querySelector(″.itemslist”).winControl;
  4.     if (viewState === Windows.UI.ViewManagement.ApplicationViewState.snapped) {
  5.         listView.layout = new ui.ListLayout();
  6.     } else {
  7.         listView.layout = new ui.GridLayout();
  8.     }
  9. }

In this case, the updateLayout event is called when the control is initially created and as the app moves through the view states so it can change the layout style for the ListView control showing the contents of the page:

imageimage

Landscape vs. Snapped view state layout for the itemsPage ListView control

The other major feature of the Grid and Split app templates — and this feature is new in the Beta bits — is the centralized data model, which is where the data for all pages comes from. This data model is defined in data.js and it contains the static group and item data as you just saw. The core of the data is exposed from data.js like so:

data.js
  1. WinJS.Namespace.define(data”, {
  2.     items: groupedItems,
  3.     groups: groupedItems.groups,
  4.     getItemsFromGroup: getItemsFromGroup
  5. });

These three members of the data object are used throughout the templates, e.g. in the itemsPage.js ready event handler:

itemsPage.js
  1. // This function is called whenever a user navigates to this page. It
  2. // populates the page elements with the app’s data.
  3. ready: function (element, options) {
  4.     var listView = element.querySelector(″.itemslist”).winControl;
  5.     ui.setOptions(listView, {
  6.         itemDataSource: data.groups.dataSource,
  7.         itemTemplate: element.querySelector(″.itemtemplate”),
  8.         oniteminvoked: this.itemInvoked.bind(this),
  9.     });
  10.     this.updateLayout(element, Windows.UI.ViewManagement.ApplicationView.value);
  11. },

Notice that the data.groups property is used on line 6 to perform a data binding operation. That data binding is against the dataSource property of the object returned from data.groups, which itself is created by a method on the WinJS.Binding.List object that holds the grouped item data. It’s this binding list, a new feature in WinJS for the Beta, that makes it easy to move from the static data provided by the templates and dynamic data that your app defines.

The binding list is a binding data source, which means that as you add items to it, it notifies any control that happens to be bound to it. This is especially handy when your app starts up with zero data, but you need to initialize the ListViews such that as the data is available (perhaps from an asynchronous network call), it will be shown.

If you open up the data.js, you’ll see the static sample data:

static sample data
  1. // Each of these sample groups must have a unique key to be displayed
  2. // separately.
  3. var sampleGroups = [
  4.     { key: group1”, title: Group Title: 1”, subtitle: Group Subtitle: 1”, backgroundImage: darkGray, description: groupDescription },
  5.    
  6. ];
  7.  
  8. // Each of these sample items should have a reference to a particular
  9. // group.
  10. var sampleItems = [
  11.     { group: sampleGroups[0], title: Item Title: 1”, subtitle: Item Subtitle: 1”, description: itemDescription, content: itemContent, backgroundImage: lightGray },
  12.    
  13. ];

The group data has a unique key, a title, a subtitle, a background image and a description, which are all fields that the data templates used in the Split and Grid apps depend upon (although you can change them if you like). The item data has a reference to the group to which it belongs, a title, a subtitle, a description, a background image and the content for the item itself.

The code that populates the binding list with the sample data looks like this:

statically bound data
  1. var list = new WinJS.Binding.List();
  2. var groupedItems = list.createGrouped(groupKeySelector, groupDataSelector);
  3.  
  4. // TODO: Replace the data with your real data.
  5. // You can add data from asynchronous sources whenever it becomes available.
  6. sampleItems.forEach(function (item) {
  7.     list.push(item);
  8. });

As the comment makes clear, it’s this code you’re most likely to want to change. Instead of pulling in static data from the sampleItems array, we want to pull the items in asynchronously, perhaps from an RSS feed or two just like my earlier post:

dynamically bound data
  1. var list = new WinJS.Binding.List();
  2. var groupedItems = list.createGrouped(groupKeySelector, groupDataSelector);
  3.  
  4. // RSS feeds
  5. var feeds = [
  6.     { key: feed1”, title: Scott Hanselman”, subtitle: a blog”, backgroundImage: darkGray, description: a blog”, url: http://feeds.feedburner.com/ScottHanselman” },
  7.  
  8.     { key: feed2”, title: Raymond Chen”, subtitle: a blog”, backgroundImage: lightGray, description: a blog”, url: http://blogs.msdn.com/b/oldnewthing/rss.aspx” },
  9.  
  10.     { key: feed3”, title: Chris Sells”, subtitle: a blog”, backgroundImage: mediumGray, description: a blog”, url: http://sellsbrothers.com/posts/?format=rss” },
  11. ];
  12.  
  13. feeds.forEach(function (feed) {
  14.     WinJS.xhr({ url: feed.url }).then(function (request) { processPosts(feed, request); });
  15. });
  16.  
  17. function processPosts(feed, request) {
  18.     // parse the RSS
  19.     var nodes = request.responseXML.selectNodes(//item”);
  20.     for (var i = 0, len = nodes.length; i < len; i++) {
  21.         var node = nodes[i];
  22.         var item = {
  23.             group: feed,
  24.             title: node.selectNodes(title”)[0].text,
  25.             subtitle: node.selectNodes(pubDate”)[0].text,
  26.             description: a post”,
  27.             content: node.selectNodes(description”)[0].text,
  28.             backgroundImage: feed.backgroundImage
  29.         };
  30.         list.push(item);
  31.     }
  32. }

In this case, our group data is a set of RSS feeds, being careful to continue to use the same group field names so I don’t have to update the data templates in the rest of the app. When the app loads, I still create a binding list, but instead of filling it directly, I start an async xhr call (the WinJS XMLHttpRequest wrapper) for each feed, creating an item for each RSS post I find upon a successful completion. Because I’ve left the data model alone and because I’m using the binding list, that’s all I have to change and now the entire app has been updated to support that data:

image

The items page with the set of feeds in the Split app template

image

The split page with the posts from the selected feed

Where Are We?

As you can see, the Metro/JS templates in the VS11 beta start simple and add features with navigation, pages with specific app pattern functionality, multiple view state support and a unified data model. The main difference is the Beta versions of this templates is that code has been simplified, beautified and pushed into WinJS as much as possible to make the inside of your app just as pretty and easy to use as the outside.

Translation

This article has been translated into Serbo-Croatian by Jovana Milutinovich. Enjoy.

January 6, 2012 telerik win8

The Windows Libraries for JavaScript: Part I

The Windows Libraries for JavaScript: Part I

DISCLAIMER: This post is targeted at the //build/ version of the Windows Developer Preview (aka Windows 8). Things are likely to change with future releases. On your head be it.

In the last post in this series, we looked at getting started building Metro style apps built using JavaScript (Metro/JS apps) with Microsoft Visual Studio 11 for the Windows Developer Preview (aka VS11) and Microsoft Expression Blend 5 Developer Preview (aka Blend).

In this installment, we’re going to take a look at the library that brings WinRT and the web platform together: the Windows Library for JavaScript (aka WinJS) and build an app while we’re doing it.

The Need for WinJS

While it is the case, as you’ll see, that a Metro/JS apps have the same access to the underlying Windows platform as any other language projection (like Metro/VB, Metro/C# and Metro/C++ apps), it’s also the case that HTML/JavaScript programmers have a certain style that they are used to programming in. In some cases, those habits need to change because Metro/JS apps aren’t web sites or even web applications; Metro/JS apps are native applications that happen to be built with HTML, JavaScript, CSS, SVG, etc.

However, in many cases, existing JavaScript habits are good ones and should be encouraged. Towards that end, Microsoft engineers have built the Windows Libraries for JavaScript (WinJS), which is a set of reusable JavaScript and CSS files which were created specifically to make it easier for you to build Metro/JS apps with the right Win8 feel” to them.

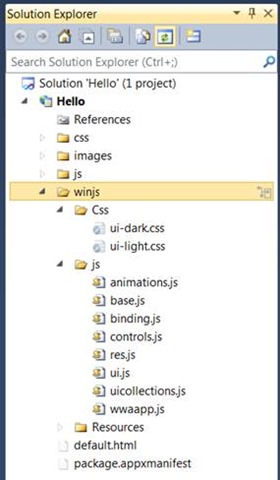
The easiest way to bring WinJS into your project is to create an application using any of the Metro/JS project templates, since all of them include the WinJS files:

clip_image002

WinJS is defined by the files under the winjs folder. The Blank Application project template produces an application with an empty window, but it does it with style; specifically the style that makes a Metro/JS app look like a Win8 app. Of course, the styles alone can’t make everything right — you’ll also need the right layout, behavior, etc. As an example of how to build a Metro/JS apps that’s slightly more exciting than the one we’ve been looking at so far, let’s build one of the most famous members of the Windows team — Raymond Chen.

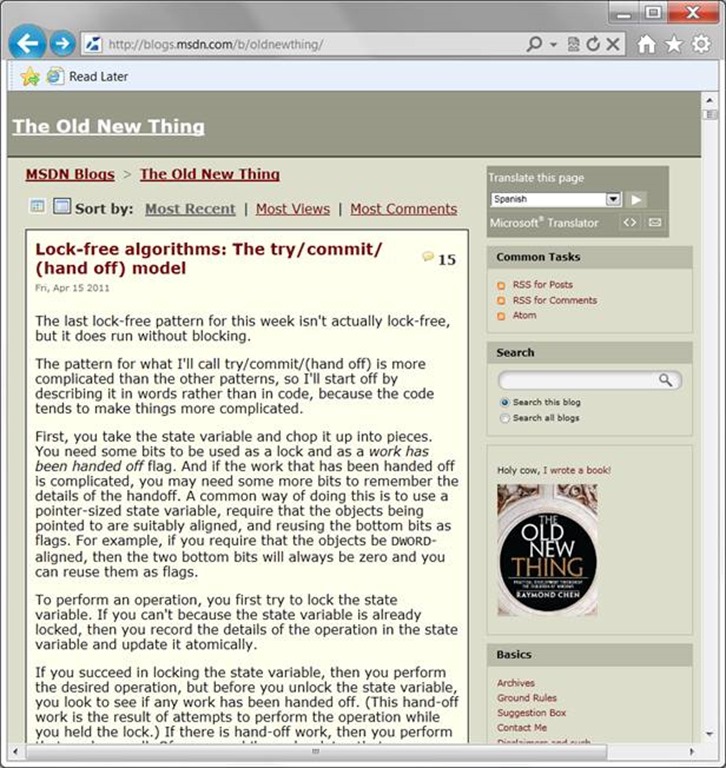
Mr. Chen is a developer on the Windows team that brought you the Windows Developer Preview (aka Win8). Further, he’s the author of the most excellent book The Old New Thing” based on a blog of the same name:

clip_image004

Chen’s blog is famous for digging into the forgotten nooks and crannies of the Windows platform. And for our purposes, Chen’s blog is an excellent target for our sample because he’s chosen a blogging platform that exposes the full text of his posts in a programmatic form (both RSS and Atom) so that we can build a Win8 app to show them.

Any blog displayed in the browser is essentially the title, date and content from each of the latest blog posts. To start, we need to download the data for each of his posts. To do that, we first need to know where to put that code.

The WinJS.Application object

The Blank Application template-generated default.html loads a minimal set of WinJS JavaScript and CSS files:

<!DOCTYPE html>
<html>
<head>
    <meta charset="utf-8" />
    <title>RssReader</title>
    <!-- WinJS references -->
    <link rel="stylesheet" href="/winjs/css/ui-dark.css" />
    <script src="/winjs/js/base.js"></script>
    <script src="/winjs/js/wwaapp.js"></script>
    <!-- RssReader references -->
    <link rel="stylesheet" href="/css/default.css" />
    <script src="/js/default.js"></script>
</head>
<body>
</body>
</html>

Updating the sample with some slightly more interesting HTML:

<!DOCTYPE html>
<html>
...
<body> <h1>The Old New Thing</h1> <div id="downloadStatus"></div> <div id="posts"></div> </body> </html>

Here we’re setting the header text of our app and creating two div elements as placeholders: one for the status of our RSS download and one for the data from the RSS when we get it. Also, let’s replace the contents of default.css with styles to match Chen’s blog:

body {
    background-color: #fff;
    color: #000;
    font-family: Verdana;
    padding: 8pt;
}

a:link, a:visited, a:active {
    color: #700;
    font-weight: inherit;
}

h1 {
    text-transform: none;
    font-family: inherit;
    font-size: 22pt;
}

#posts {
    width: 99%;
    height: 100%;
    overflow: auto;
}

.postTitle {
    color: #700;
    font-size: 1.2em;
    font-weight: bold;
}

.postDate {
    color: #666;
    font-size: 11pt;
}

.postContent {
    font-size: medium;
    line-height: 18px;
}

To support app lifetime, Win8 provides a set of app-level events. The generated default.js file subscribes to the app’s mainwindowactivated event and then starts the WinJS application:

(function () {
  'use strict';
  // Uncomment the following line to enable first chance exceptions.
  // Debug.enableFirstChanceException(true);

  WinJS.Application.onmainwindowactivated = function (e) {
    if (e.detail.kind ===
Windows.ApplicationModel.Activation.ActivationKind.launch) {


// TODO: startup code here } } WinJS.Application.start(); })();


The contents of the generated default.js file are contained within a self-executing anonymous function declaration (that is a mouthful — it’s fun to use a language with key concepts missing).

By default, any function or variable defined outside of a function in your JavaScript files is global across your Metro/JS app. Variables and functions defined within a function are only visible within that function. The template uses this outer function declaration to help you follow good JavaScript design patterns, ensuring that your functions and variables do not pollute the global namespace.

After grabbing the Application object from the WinJS namespace, the code subscribes to the event fired after the application and its resources (like default.html) have been loaded. This is a good place to do initialization, as we’ll see.

For any of the application events to fire, you need to let the application know you’re ready to receive them, which is what the call to the start method does.

The mainwindowactivated event handler is the perfect place for us to kick off the download of the data from Chen’s blog.

Async HTTP using WinJS.xhr

The xhr function in the WinJS namespaces provides a series of options for downloading data in both text and XML formats using HTTP. The name of the xhr function stands for XMLHttpRequest, which is the name of the object that sparked the AJAX/Web 2.0 revolution around 2005 (although the object has been part of Internet Explorer since version 5.0 released in 1999). The xhr function provided with WinJS is a wrapper that takes a number of options, including which HTTP verb to use (GET by default), which HTTP headers to include (none by default) and which URL to retrieve data from:

WinJS.Application.onmainwindowactivated = function (e) {
  // start the download
  var chen = "http://blogs.msdn.com/b/oldnewthing/rss.aspx";
  downloadStatus.innerText = "downloading posts...";
  WinJS.xhr({ url: chen }).then(processPosts, downloadError);
}

Instead of providing the option to retrieve the data synchronously or asynchronously the way the XMLHttpRequest object does, xhr forces an asynchronous call so that the UI will not be blocked while data is retrieved. You’ll see this all over the Win8 programming model as reflected into Metro/JS and it helps you make more responsive programs. In our case, because we don’t know how long the request is going to take, we’re setting the text content of the downloadStatus div to indicate progress.

Asynchronous functions from WinJS return an object called a promise, which represents results to be provided at some time in the future. The promise object exposes the then method, which takes an optional three functions, one for success, one for failure and one for progress.

The call to the xhr function returns the promise immediately, at which point we set the functions to call in the case of success or failure, ignoring progress:

function processPosts(request) {
  // clear the progress indicator
  downloadStatus.innerText = "";

  // parse the RSS
  var items = request.responseXML.selectNodes("//item");
  if (items.length == 0) {
    downloadStatus.innerText = "error downloading posts";
  }

  for (var i = 0, len = items.length; i < len; i++) {
    var item = items[i];

    // append data to #posts div
    var parent = document.createElement("div");
    appendDiv(parent, item.selectNodes("title")[0].text, "postTitle");
    appendDiv(parent, item.selectNodes("pubDate")[0].text, "postDate");
    appendDiv(parent, item.selectNodes("description")[0].text, "postContent");
    posts.appendChild(parent);
  }
}

function appendDiv(parent, html, className) {
  var div = document.createElement("div");
  div.innerHTML = html;
  div.className = className;
  parent.appendChild(div);
}

function downloadError() {
  downloadStatus.innerText = "error downloading posts";
}

When the xhr call has completed successfully, the processPosts function is called with a request object which has all the information as if we’d use the XMLHttpRequest object directly. The property we care about is responseXML, which contains the RSS data we requested. From the RSS, we use an XPath expression to select the set of item nodes, extracting the title, pubDate and description data to be used to create a div element per item, with div elements for each of the pieces of data we’re showing, styled appropriately.

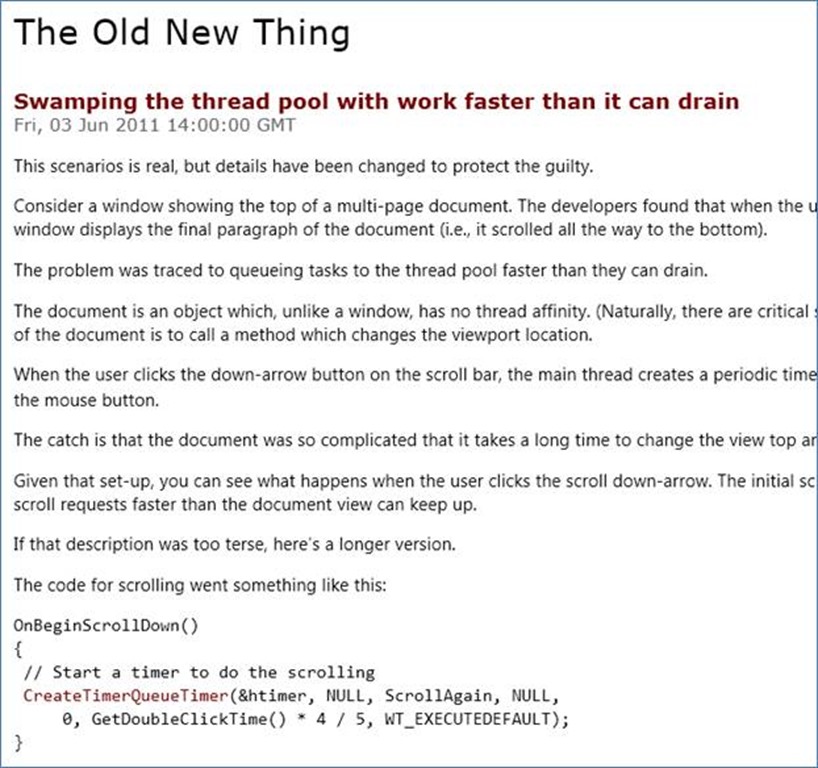
For readers of The Old New Thing, the output should look pretty darn familiar:

clip_image006

At this point, you may worry about whether our use of the xhr function will actually work, since a page provided by a web server would fail. The reason this works is because Metro/JS apps run in a secure sandbox and are, by default, allowed the ability to make cross-domain HTTP requests even though web pages are not.

Actually, it’s not quite true that Metro apps are allowed access to the Internet by default — it’s just that Metro app project in VS11 are provided that access by default, as it’s such a common need.

Where Are We?

At this point, we’ve built a working Metro/JS app that does a real thing using WinJS. In the next installment, we’ll look at how WinJS provides features to make DOM manipulation better.

Portions Copyright © 2011 Microsoft Corporation. Reproduced with permission from Microsoft Corporation. All rights reserved.

January 4, 2012 telerik win8

Metro style JS Apps in VS11 & Blend

Metro style JS Apps in VS11 & Blend

DISCLAIMER: This post is targeted at the //build/ version of the Windows Developer Preview (aka Windows 8). Things are likely to change with future releases. On your head be it.

In the previous post in this series, we discussed how to build a deploy a Metro style app built with JavaScript completely from the command line. That’s a useful exercise to prove that there’s no real magic, but I don’t expect most people to do things that way. I expect most people to use Visual Studio.

Visual Studio 11

Microsoft Visual Studio 11 Express for Windows Developer Preview (aka VS11) is the premiere tool for developing applications for Windows and has been for quite a while. It provides project management for keeping your application’s source files together, integrated build, deployment and launching support, HTML, CSS, JavaScript, graphics and Metro style app manifest editing, debugging and a whole lot more. Visual Studio 11 Express comes for free and includes everything you need to build, package and deploy your Metro style apps.

Out of the box, VS11 provides several project templates to get you started:

image

The most basic template is the Blank Application project template. Running it produces a project file (.wwaproj) along with nearly the same set of files we used to create the first sample project from the command line. The Blank project template also creates some additional files, which we’ll discuss presently.

clip_image004

The format and the contents of the package.appxmanifest file is the same as the appxmanifest.xml file we’ve already seen, but the .appxmanifest extension allows the file to have a custom editor in VS11:

clip_image006

If you open the provided default.html, you’ll see it’s a nearly empty vessel, waiting to accept your creativity. The provided default.js (under the js folder) is similarly nearly empty, with just some skeleton code that we’ll discuss later.

To debug your application, choose Debug | Start Debugging, which gives you the kinds of debugging tools an experienced Visual Studio user is used to:

  • Debugger: Set breakpoints, step and watch JavaScript data and behavior.
  • JavaScript Console Window: Interact with JavaScript objects at a command line.
  • DOM Explorer Window: Dig through the HTML Document Object Model and see styles by element.
  • Call Stack: See the current JavaScript call stack.

In addition to debugging your application on the local machine (which is the default), you have two other options: remote machine and the simulator. You can change these options by choosing Project | Properties and selecting the debugger to launch:

clip_image008

The idea of remote machine debugging is that you can develop on a high-powered developer machine but debug on a more modest consumer-grade machine, like a tablet. This is handy to make sure your application works well on the type of machines you’re targeting.

The simulator option, on the other hand, is meant to let you run another little machine on the machine you’re already running. The simulator is a remote access session that’s configured to allow you to simulate various resolutions, landscape and portrait rotations and touch, even if you’re not using a touch-capable device:

image

And as that if that weren’t enough, Visual Studio is not the only tool you’ve got in the drawer. If you’d like a WYSIWYG design experience for the visual portion of your application, you’ve got Blend.

Expression Blend 5

Previous version of Blend focused on the XAML developer. Microsoft Expression Blend 5 Developer Preview (aka Blend), however, adds HTML support for building Metro style JS apps specifically. Blend comes with the following features for designing and building Metro/JS apps:

  • Integration with Visual Studio: You can load the same projects in both VS and Blend. In fact, you can load the project you’re currently working on in VS by right-clicking on a project in the Solution Explorer and choose Open in Expression Blend.
  • Project Templates: Blend and Visual Studio have the same set of project templates.
  • WYSIWYG Design: Each page of your application is laid out as you’d see it when the app is running because Blend is actually running your application to display it accurately as you edit.
  • Interactive Design: You can throw a switch in Blend to actually run your application interactively as you navigate page-to-page, then when you get to a page you’d like to design, you can flip the switch again and edit your application. Talk about a quick edit-test cycle!
  • Tool Pallet: The full set of controls and options are available from a tool pallet and property editor.
  • Layout Simulator: In the same way that VS provides a device simulator, Blend allows your application to be run and edited in one of several sizes and rotations.

Here’s Blend in action on the Hello” sample:

image

Those of you familiar with Blend will notice many similarities between the XAML version and the HTML version.

Where Are We?

At this point, you have all you need to know to get started building Metro/JS apps using HTML5, CSS3, JavaScript, SVG, etc. (assuming you know HTML5, CSS3, JavaScript, SVG and et cetera). Next time, I’ll introduce the library built to bridge the two worlds of the WinRT and the web platform — WinJS.

Portions Copyright © 2011 Microsoft Corporation. Reproduced with permission from Microsoft Corporation. All rights reserved.

January 2, 2012 telerik win8

Your First Metro style App in JavaScript

Your First Metro style App in JavaScript

DISCLAIMER: This post is targeted at the //build/ version of the Windows Developer Preview (aka Windows 8). Things are likely to change with future releases. On your head be it.

A Windows Metro style app” is an application built for the devices running the new Windows user experience of Windows 8. A Metro style app built using JavaScript is a first class Windows application built with the technologies of the web, e.g. HTML, CSS, JavaScript, JSON, SVG, etc. Unlike a web site, a Metro JS app is not deployed page-by-page from a web server, but rather installed locally on the user’s machine. Like any other first class Windows app, a Metro JS app has access to the underlying platform and is able to share information with other apps.

Like any web site, a Metro JS app starts with an HTML file:

<!DOCTYPE html>
<html>
<head><title>Hello, Win8</title></head>
<body><h1>Hello and welcome to Metro style Win8!</h1></body>
</html>

This HTML, if it were loaded in the web browser, would result in the world’s most boring web site. Also, surfing to a web page in the browser is not at all how your customers will execute a Metro style app. Instead, they’ll install it from the Windows Store and execute it from the Start Screen:

image

Further, a web page (or series of web pages, styles, code, resources, etc.) is not a Metro JS app. A Metro JS app includes these things, but also includes metadata and resources:

  • A manifest file to describe your application, including the name, description, the start page, etc.
  • A set of large and small logo images to be displayed by the shell.
  • A store logo to be displayed by the Windows Store.
  • A splash screen to show when your app starts.

The manifest file is an XML file called appxmanifest.xml and a minimal one looks like this:

<?xml version="1.0" encoding="utf-8"?>
<Package xmlns="http://schemas.microsoft.com/appx/2010/manifest">

  <Identity
    Name="hello"
    Version="1.0.0.0"
    Publisher="CN=Microsoft Corporation, O=Microsoft Corporation,
L=Redmond, S=Washington, C=US
" /> <Properties> <DisplayName>Hello</DisplayName> <Description>Hello</Description> <PublisherDisplayName>csells</PublisherDisplayName> <Logo>images\storelogo.png</Logo> </Properties> <Prerequisites> <OSMinVersion>6.2</OSMinVersion> <OSMaxVersionTested>6.2</OSMaxVersionTested> </Prerequisites> <Resources> <Resource Language="en-US" /> </Resources> <Applications> <Application Id="hello.App" StartPage="default.html"> <VisualElements DisplayName="Hello" Logo="images\logo.png" SmallLogo="images\smalllogo.png" Description="Hello" ForegroundText="light" BackgroundColor="#0084FF"> <SplashScreen Image="images\splashscreen.png" /> </VisualElements> </Application> </Applications> </Package>

The manifest has things in it like the name of the application, the description for the application, a reference to the images and, most importantly, the name of the HTML file that represents the app’s start page.

With the manifest and supporting files in place, getting your super exciting app registered with the system is a matter of starting up PowerShell (which you can do from the Start Screen by typing powershell”), and importing the appx” module (Figure 1).

image

If you’re not familiar with it, Windows PowerShell is the next-gen command line shell built into Windows. Out of the Win8 box, it comes with the appx” module, which allows you to manage the modern applications installed on your computer:

  • Add-AppxPackage: install an application so that it can be launched
  • Get-AppxPackage: get a list of installed applications
  • Get-AppxPackageManifest: get the manifest details of an installed application
  • Get-AppxLastError: get the details for the last appx-related error
  • Remove-AppxPackage: uninstall an application

The appx” part of the command names come from the packaged form of a Metro style app, which is called an appx” after the file extension. To create one, you can use the MakeAppx.exe” command-line tool available via the Developer Command Prompt available on the Start Screen. The job of MakeAppx.exe is to package your application, manifest and all, into a single file with a .appx” extension. An appx file is a file in the Open Packaging Conventions (OPC) format, which essential means it’s a .zip file with a few extras. If you’re going to package and sign your application for submission into the Windows Store, you may decide to use MakeAppx.exe and SignTool.exe as part of that process.

However, to simply test an application on your developer box, Add-AppxPackage gives you all you need:

image

In addition to taking a path to a .appx file, the Add-AppxPackage command allows you to pass in the path to a manifest file using the -Register option, which gives you the ability to install your application for testing without going through the extra step of packaging:

image

You can double-check that your application has been installed using the Get-AppxPackage command.

Once your application has been installed, you can see it in the shell:

image

Launching it will you show the inspirational Hello” message displayed full-screen without any Windows chrome.

Where Are We?

After seeing what files and tools used to build and install a Metro style app, you’re probably already hoping for a tool to help you create, edit, package, launch and debug. For that, we’ve got Microsoft Visual Studio 11 Express for the Windows Developer Preview (aka VS11), which we’ll talk about next time.

Portions Copyright © 2011 Microsoft Corporation. Reproduced with permission from Microsoft Corporation. All rights reserved.